Subtitles on Twitter are a pain. You should include them anyway. Here's how.
Video subtitles on Twitter are a PAIN IN THE ASS.
NO, that's not an excuse to exclude them from your videos.
Let's make it less of a pain in the ass in 2 minutes or less.
Twitter video is great for engagement. But for it to have as wide a reach as possible, you need subtitles.
Turns out, however, adding subtitles to your video is a huge headache.
In 2 minutes, it'll be less of a headache.
Read on.
Step 1: Upload your video
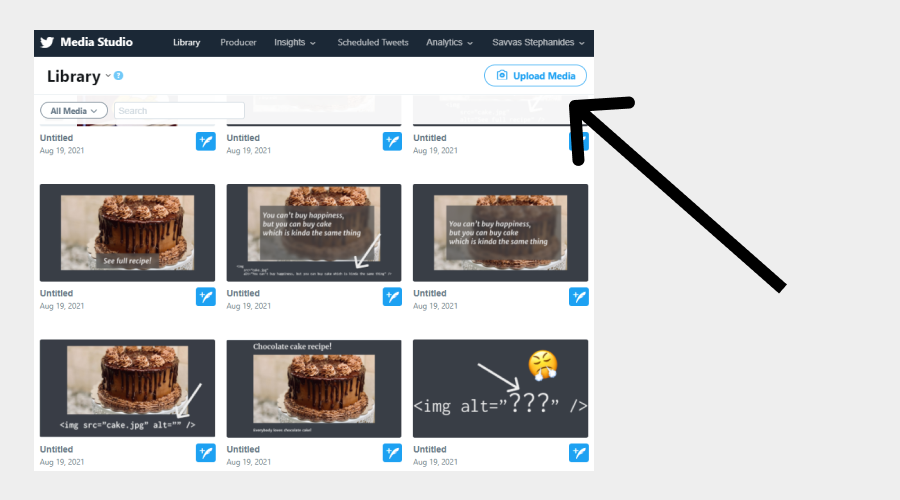
To upload your video on Twitter, first head to Media Studio, on either desktop or mobile.
Click on Upload Media.

and select your video.
Step 2: Create the subtitles file
Next step is to create the subtitles file.
It's called an SRT file.
It looks like this:
1
00:00:02,000 --> 00:00:08,000
This is some text

2
00:00:08,000 --> 00:00:10,000
This is some more text

3
00:00:10,000 --> 00:00:22,000
Even more text
- The first line is the order for each line of your subs, starting with 1
- The second line is the starting and ending time. Example: 00:00:02,000 --> 00:00:08,000 means that the line starts at 2 seconds and ends at 8 seconds
- The third line is the actual subtitle text.
Use Notepad, VSCode or any text editor to create your own file. Follow this pattern each time somethin in your video needs subtitling (speech, sounds etc).
Step 3: Add the file to your video
Save your subs file as a .srt file.
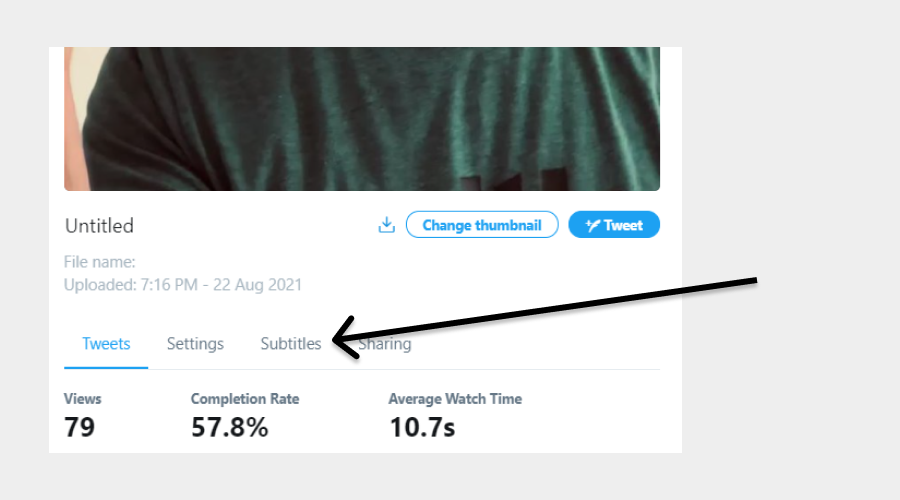
Go back to the Media Studio and click on your video.
Click on the Subtitles tab.

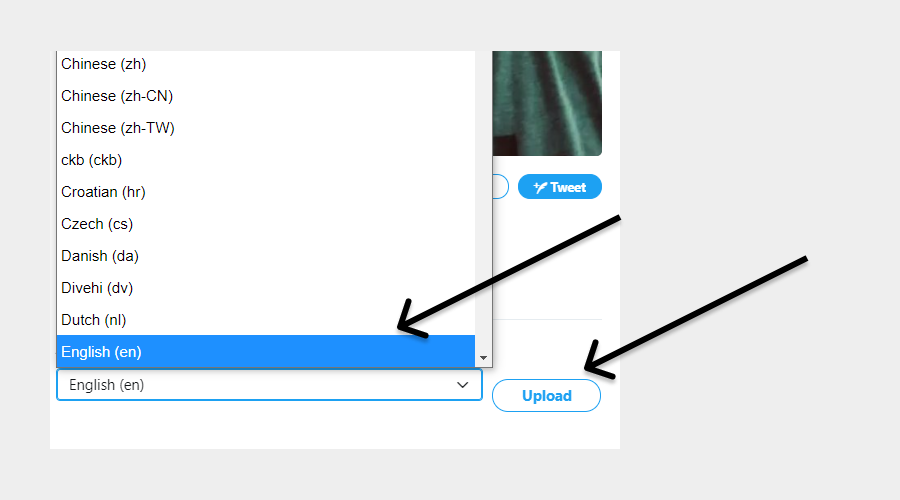
Choose a language (eg. English) from the dropdown and click Upload.

Choose the .srt file you just created.
It should soon be added to the Languages list below.

You're done! The subtitles should soon show up on your video!
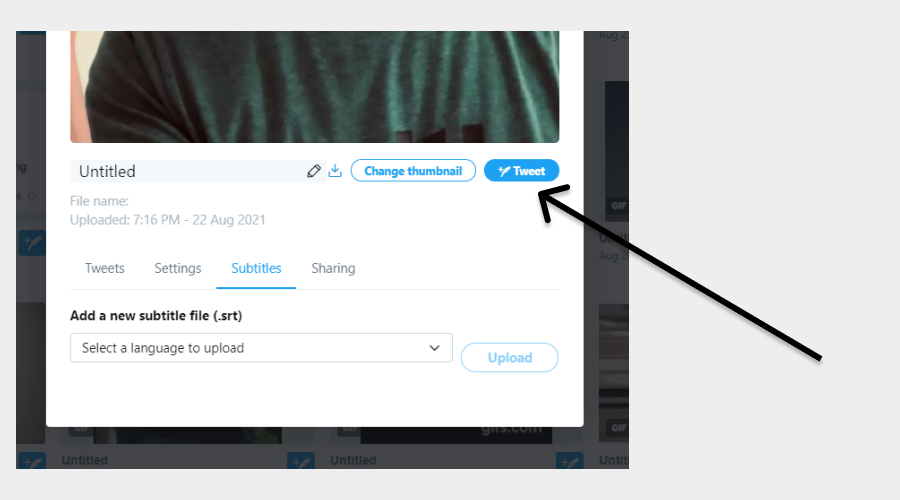
Step 4: Tweet your video
Use the Tweet button to share your subtitled video.

Your viewers should be able to see the subtitles by clicking the "CC" button at the bottom right of the video.
